User manual For Autel MaxiCOM MK808TS
Matched product:
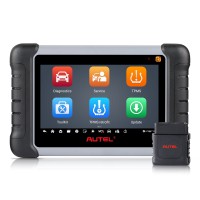
Original AUTEL MaxiCOM MK808TS MK808Z-TS Diagnostic Tool With TPMS services Sensor Activation Update Online
- Item No. SP295-B
- Free Shipping
How to use Autel MaxiCOM MK808TS?
Software Update:
Note:Make sure the diagnostic tablet is connected to the internet and the tablet has sufficient battery or is connected to a power source.
Step 1:Tap the Update application button from the Diagnostic Job Menu and the Update screen displays.
Step 2:Check all available updates:
a)if you want oto update all the items,tap the "Update All" button
b)if you want to update one or some of the item,tap the "Update" button on the right column of the specific item(s).
Step 3:Tap "Pause" to suspend the updating process.Tap "Continue" to resume.
Step 4: When the updating process is completed,the software will be installed automatically.The previous version will be replaced.
MaxiVCI Mini Firmware Update:
Method 1:
Step 1:Connect the MaxiVCI Mini to a PC using a USB cable.
Step 2:Run the "PC Suite" on the computer which is installed after the installtion of Maxi PC Suite and click MaxiVCI Mini icon on the Device Selection window.
Step 3:The driver will automatically detect the updates of the device.
Step 4:Click "Update" to complete the operation if an update is available.
Method 2:
Step 1:Connect the MaxiVCI Mini with the Diagnostic Tablet using a USB cable.
Step 2:Tap VCI Manager from the Diagnostics Job Menu,and then Update to complete the operation if an update for the MaxiVCI Mini is available.
Step 1:Visit official website:www.autel.com,then create an Autel ID and register the product with device's SN and password.
Step 2:Insert the MaxiVCI Mini into the vehicle's DLC,which is generally located under the vehicle dash.
Step 3:Long press the Lock/Power button to turn on the Diagnostic Table.
Step 4:Pair up the Diagnostic Table with the VCI device via Bluetooth to establish a communication link
When the VCI device is properly connected to the vehicle and the Diagnostic Tablet,the VCI status button at the buttom bar on the
display screen shows a green tick at the corner.This indicates your Diagnostic Tablet is ready to start vehicle diagnosis.